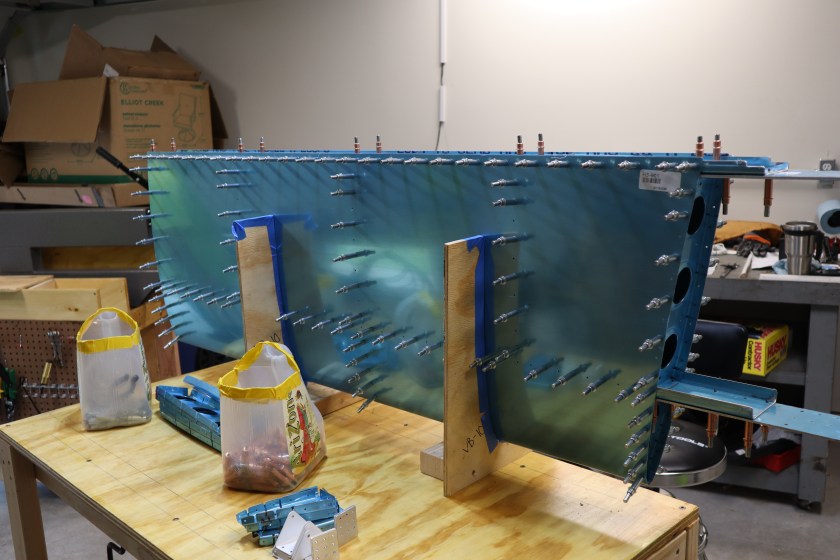
So, in the last post I discussed assembling the skeleton for the horizontal stabilizer. After the skeleton was disassembled and cleaned up, the structure was “rebuilt” inside the skin. The skin is the thin metal sheet that is the outside surface of the airplane. The skin is put into a jig that has a the contour of the horizontal stabilizer cut out. This helps to hold the shape while assembling the structure.
Once the skins are in the jig, I started adding the front ribs (aka nose ribs) to the skin with clecoes. Next, you add the front spar and cleco it to the nose ribs and the skin. You keep building inside the skin. Next up is the main ribs, and finally the rear spar.
After the everything is in place, the holes were match drilled to final sized. The entire process was completed for the left side, then it was disassembled, and the right side was completed the same way.

Once both sides were disassembled, it was time to start the final prep of the parts. The skins and ribs had to be dimpled. This refers to putting a small depression into the metal so that a rivet will sit flush once set. This is done with the DRDT-2 and the pneumatic squeezer.
The spars are too think to dimple, so they much be machine countersunk. This is completed by physically removing material with a cutter to create the small depression. The skin dimple will sit inside the machine countersunk depression.
So this is as far as I can go right now. I need to prime the parts, but weather is not cooperating. I will start work on the Vertical Stabilizer next.
